Code Signing in Windows Applications
Verifying digital signatures and detecting tampering in Windows applications.
Introduction
When pentesting a Windows application, one of the first things I check is whether it’s properly signed. An unsigned binary, or one with a broken signature, is a red flag that the app could have been tampered with or never came from a verified source.
Code signing uses digital signatures to verify the authenticity and integrity of executables. Any modification to a signed binary invalidates the signature. In this post, I’ll walk through how to verify signatures and show how tampering breaks them.
Why Code Signing Matters
Code signing serves two main purposes:
- Authenticity - Confirms the application comes from a verified publisher
- Integrity - Detects any tampering or modification to the executable
Without proper code signing, attackers can:
- Modify a real app without anyone noticing the change
- Distribute fake software that looks like it comes from a trusted company
- Slip past security tools that decide what to trust based on signatures
During security assessments, unsigned apps or self-signed certificates in production should be reported as findings.
According to OWASP Desktop App Security Top 10, lack of proper code signing falls under DA8 - Poor Code Quality.
File Types That Support Code Signing
Code signing isn’t limited to .exe files. Other common Windows formats that can be signed:
.exe/.dll- Executables and libraries.sys- Kernel drivers.msi/.msix- Windows installer packages.ps1- PowerShell scripts.cat- Catalog files (used for driver and update signing)
This post uses .exe for the demonstration, but the same verification principles apply to other file types.
Demonstration: Signature Verification
We’ll demonstrate how code signing works and how it detects tampering.
Step 1: Create Unsigned Application
Create a simple C++ application:
1
2
3
4
5
6
#include <iostream>

int main()
{
    std::cout << "Hello World!\n";
}
Build it as x64 Release in Visual Studio.
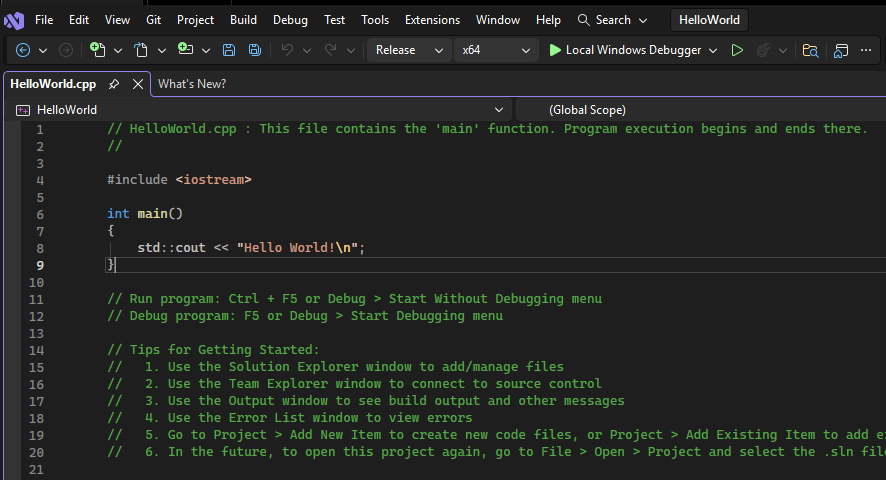 Visual Studio code
The executable will be at x64\Release\HelloWorld.exe.
Step 2: Verify Signature Status
Using Windows Properties:
Right-click the executable → Properties → Digital Signatures tab
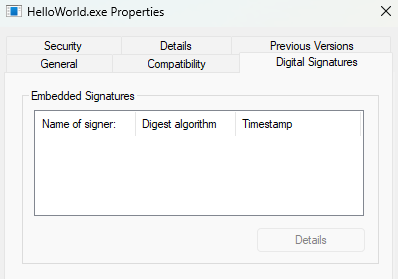 Unsigned application - Digital Signatures tab is empty
Using sigcheck:
Use sigcheck from Sysinternals:
1
2
3
4
5
6
7
8
9
10
11
12
13
14
15
16
17
18
19
PS > .\HelloWorld.exe
Hello World!

PS > sigcheck .\HelloWorld.exe

Sigcheck v2.90 - File version and signature viewer
Copyright (C) 2004-2022 Mark Russinovich
Sysinternals - www.sysinternals.com

C:\path\to\HelloWorld.exe:
        Verified:       Unsigned
        Link date:      07:56 04/01/2026
        Publisher:      n/a
        Company:        n/a
        Description:    n/a
        Product:        n/a
        Prod version:   n/a
        File version:   n/a
        MachineType:    64-bit
Result:
The application is Unsigned. Without a signature, there’s nothing to verify against, so modifications go unnoticed.
Step 3: Create Self-Signed Certificate
For testing, we’ll create a self-signed certificate. Production environments should use trusted Certificate Authorities like DigiCert, Sectigo, or GlobalSign.
1
2
3
4
5
6
7
8
9
10
11
12
13
# Create certificate
$cert = New-SelfSignedCertificate `
    -Subject "CN=Lab Code Signing Certificate" `
    -Type CodeSigningCert `
    -CertStoreLocation "Cert:\CurrentUser\My" `
    -NotAfter (Get-Date).AddYears(1)

# Export to PFX file
$password = ConvertTo-SecureString -String "LabPassword123" -Force -AsPlainText
Export-PfxCertificate `
    -Cert $cert `
    -FilePath "C:\path\to\codesign.pfx" `
    -Password $password
Step 4: Sign the Application
Use signtool (included in Windows SDK):
1
signtool sign /f codesign.pfx /p LabPassword123 /fd SHA256 HelloWorld.exe
Using Windows Properties:
Right-click the signed executable → Properties → Digital Signatures tab
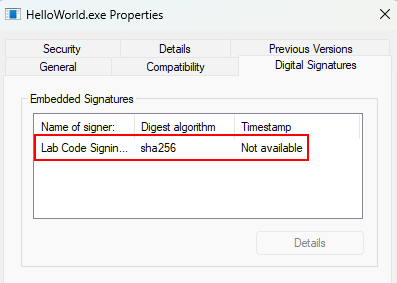 Signed application - Digital Signatures tab shows certificate details
Using sigcheck:
1
2
3
4
5
6
7
8
9
10
11
12
13
14
15
16
PS > sigcheck .\HelloWorld.exe

Sigcheck v2.90 - File version and signature viewer
Copyright (C) 2004-2022 Mark Russinovich
Sysinternals - www.sysinternals.com

C:\path\to\HelloWorld.exe:
        Verified:       A certificate chain processed, but terminated in a root certificate which is not trusted by the trust provider.
        Link date:      07:56 04/01/2026
        Publisher:      Lab Code Signing Certificate
        Company:        n/a
        Description:    n/a
        Product:        n/a
        Prod version:   n/a
        File version:   n/a
        MachineType:    64-bit
The application is signed but shows a warning because the certificate isn’t trusted. This is expected for self-signed certificates.
Step 5: Trust the Certificate (Testing Only)
To make Windows trust this self-signed certificate locally, import it to the Trusted Root store:
1
2
3
4
5
6
7
8
9
10
11
# Run as Administrator
PS > Import-PfxCertificate `
    -FilePath "C:\path\to\codesign.pfx" `
    -CertStoreLocation Cert:\LocalMachine\Root `
    -Password (ConvertTo-SecureString -String "LabPassword123" -AsPlainText -Force)

   PSParentPath: Microsoft.PowerShell.Security\Certificate::LocalMachine\Root

Thumbprint                                Subject
----------                                -------
37EC816665AC772A6375F6DD87AA2ED4B84093C5  CN=Lab Code Signing Certificate
Verify again:
1
2
3
4
5
6
7
8
9
10
11
12
13
14
15
16
PS > sigcheck .\HelloWorld.exe

Sigcheck v2.90 - File version and signature viewer
Copyright (C) 2004-2022 Mark Russinovich
Sysinternals - www.sysinternals.com

C:\path\to\HelloWorld.exe:
        Verified:       Signed
        Signing date:   08:08 04/01/2026
        Publisher:      Lab Code Signing Certificate
        Company:        n/a
        Description:    n/a
        Product:        n/a
        Prod version:   n/a
        File version:   n/a
        MachineType:    64-bit
Now the signature is Verified: Signed.
Step 6: Test Tampering Detection
Let’s modify the signed binary to demonstrate signature validation:
- Open
HelloWorld.exein Ghidra - Locate the “Hello World!” string
- Change it to “HACKED!!!!!!”
- Export as
HelloWorld-patched.exe
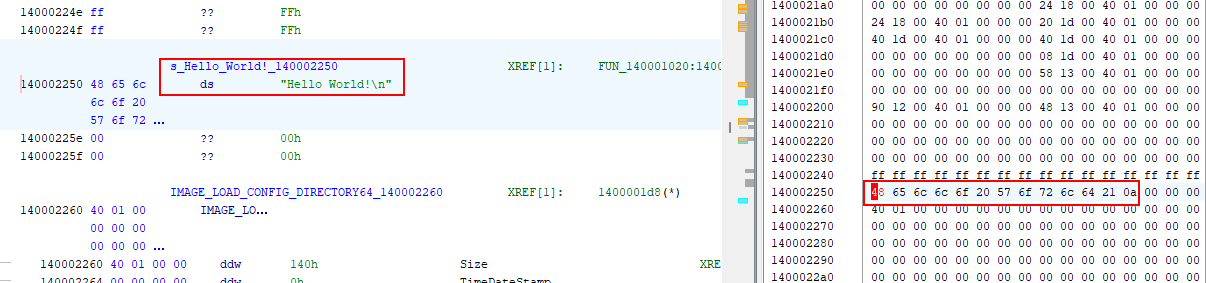 Original “Hello World!” string
 Patched to “HACKED!!!!!!”
Run and verify the patched binary:
1
2
3
4
5
6
7
8
9
10
11
12
13
14
15
16
17
18
19
PS > .\HelloWorld-patched.exe
HACKED!!!!!!

PS > sigcheck .\HelloWorld-patched.exe

Sigcheck v2.90 - File version and signature viewer
Copyright (C) 2004-2022 Mark Russinovich
Sysinternals - www.sysinternals.com

C:\path\to\HelloWorld-patched.exe:
        Verified:       The digital signature of the object did not verify.
        Signing date:   09:38 04/01/2026
        Publisher:      Lab Code Signing Certificate
        Company:        n/a
        Description:    n/a
        Product:        n/a
        Prod version:   n/a
        File version:   n/a
        MachineType:    64-bit
Result:
The digital signature of the object did not verify.
Even a small modification breaks the signature, making tampering easy to detect.
Conclusion
We’ve walked through how signature verification works and how tampering breaks it. The patching in Step 6 was a quick demo, while Binary Injection in Windows Applications covers a more realistic tampering case.